Thursday, December 29, 2011

Changing Eyebrow Color

In some cases it's fine for your eyebrows not to be the same color as your hair ( i.e. people with fire engine red hair and brown eyebrows)

But in other cases, if your eyebrows don't match you can look kind of.. well.. stupid.

Hence why they invented Brow Gel!


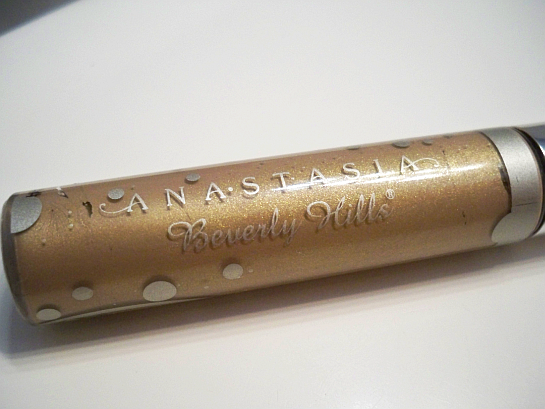
Anastasia's Tinted Brow Gel is pretty legit stuff. It comes in 5 shades:

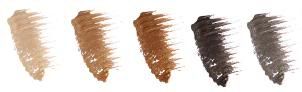
Blonde – Suggested for light blonde to medium blonde hair
Caramel – Suggested for golden brown to light brunette hair
Brunette – Suggested for medium brown to dark brown hair
Espresso – Suggested for black to jet black hair
Granite – Suggested for salt and pepper to silver hair


Since I've lightened my hair again I went from Caramel to Blonde.


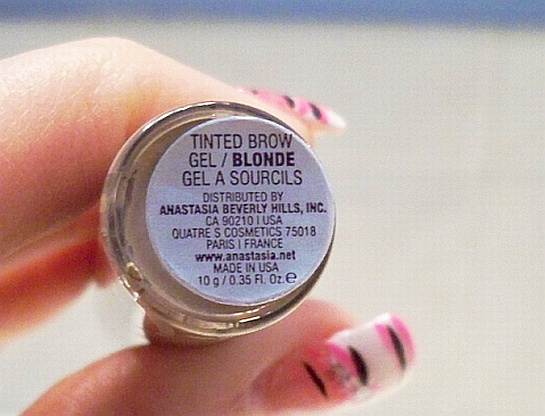
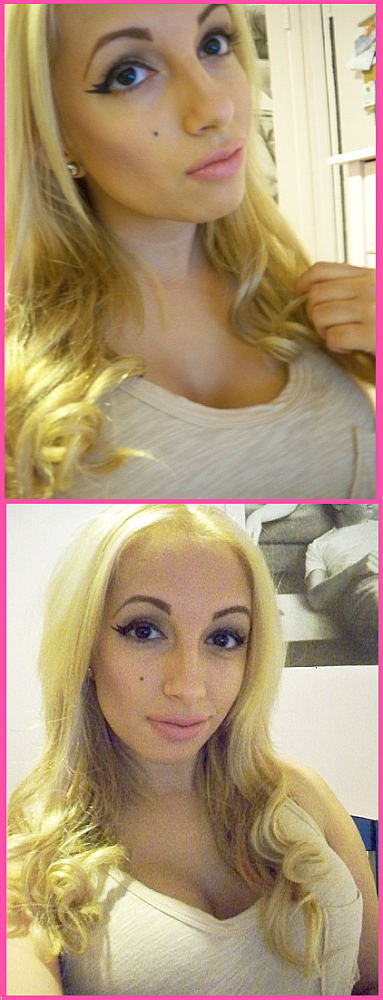
I'm a natural brunette and my eyebrows are black. So you can imagine how strange I looked once I went much lighter. So I bought this stuff ! :) It's stay on ALL DAY. I put brown eye shadow as a base on my eyebrows then the blonde gel.
Miracles.


How To Make Vitamin E Lip Balm

This a basic way to make Vitamin E lip balm, which is awesome for moisturizing your lips and also prevents your lipstick from chapping up and making you basically look like you're foaming at the mouth.
So this is what you'll need! :


Vaseline ( petroleum jelly ) & Vitamin E oil


1/2 Tablespoon & 1/8 tsp measuring spoons


And a small container for your lip balm. This size fits the measurements in this recipe and you'd have to change accordingly obviously to whatever size you use.


1. Scoop out 1 tablespoon of petroleum jelly onto a paper plate and put into the microwave for 30 to 40 seconds depending on the power of your microwave. This makes it alot easier to mix the oil.

2. While you have that going on, Put 3/8 tsp of vitamin e oil into the empty lip balm container. Then scoop the softened jelly into the container and mix well. I found a couple of toothpicks to be useful.


It should look something like this depending on how much oil you used.

3. Place the container in the freezer for 30 mintues to an hour. It's going to be a bit slippery. If you dont like it that way you can always make another batch with 1/8 tsp less oil.

This is an extremely versatile recipe because you dont have to be absolutely accurate and you can also add many more ingredients. You can add or lessen the amount of oil and the balm will still serve its purpose :) .. So have fun with it! That's the upside of low-budget living. You get to be crafty. <3


Tips:

* If you want you can always add shimmer eyeshadow, kool-aid, and other oils like grapefruit and lavender. I've even heard of using pixi sticks and honey. Just remember with honey, you should keep in mind that since it's food, it has a shelf-life;  so its best to keep it in the fridge at that point and it evenutually will have to be thrown out.

* If you want a firmer base  then beeswax is your best bet. It makes it more firm like the store-brand lip balms whereas Vaseline is a little more slippery.

* You should play around with the ratio of Vaseline to Vitamin E oil according to your preference of shine and density.


Saturday, December 24, 2011

The Lifesaver Of All Lifesavers!

My hair is damaged. I mean, crazy-should be bald by now- damaged. I heard Moroccan Oil was a god send. But I'm on a super low budget. So for christmas my mother bought me Organix's Brazilian Keratin Therapy. It was only $8.49! But does the work of a $40 bottle of Moroccan Oil.

I put it in my hair after towel drying it, blow dry and it makes my hair the softest it's ever been. No joke. I've used Paul Mitchell products, Moroccan Oil spray, Citre Shine,.. a ton of products. I have never gotten results as perfect as this.


It also smells amazing. I was shocked to see that I can get something of this quality right off the shelf in CVS. Some beauty supply stores won't even let you buy anything in their store unless you are a licensed hairdresser and their products can be a little expensive. This stuff is inexpensive and completely worth it. Whether you want your hair to become stronger or resuscitate it back to life, Brazilian Keratin Therapy is the answer.


And the cherry on top...They don't test on animals! <3 <3


Properly Cleaning Brushes and Makeup

       The absolute utmost important thing when you're a make-up artist is DISINFECTION!  I clean my brushes and makeup after every client. For myself, I clean them every two or three times. I do my makeup basically everyday so it gets a little tedious cleaning my entire kit that often but its well worth it. No one likes styes or eye infections.


I use these 70% alcohol pads on my brushes. I love how convienient they are and they get the job done. They come 100 in a pack, but it's basically like 200 because you can obviously use both sides so these last long for me. I also use them for my lipsticks :)

For my makeup I put 91% alcohol in a small 3oz plastic spray bottle and spritz it all over my palettes; my blushes, eyeshadows, cream eyeshadows and liners, anything. Plus you can decorate and personalize them! >.<


     I use Sephora's Daily Brush Cleaner when I've run out of rubbing alcohol. It's a quick way to clean the brushes if you don't have time to do a deep clean. I places my brushes over a paper towel, spray each brush once on both sides, then wipe. Sephora also has a Purifying Brush Shampoo which is for the deep clean you should do once a week or month depending ofcourse on how much y0u do your makeup.


So however long it takes you, just do it. You never know what germs you contract, even if they are your own. I know people who have used the same blushes for years and wonder why they are always breaking out on their cheeks. Its from the bacteria. Since we're on the subject of clean: Always change your mascara after 3 months. Germs can enter the tube through the air from pumping when you apply it to your lashes. If your mascara has even slightly started to clump up, throw it out! lol :) <3

Friday, December 23, 2011

Review Friday : Make Up Forever Glossy Full Couleur & Make Up Forever Aqua Lip lipliner

As you may know or not know. I'm a blonde. I also love having a tan ( though the minor lack therefore due to this wrecthed winter :[ ) As if I couldn't get anymore California in a New York world, I discover these two lovely beauties.


Make Up Forever's Glossy Full Couleur #3

The color comes out a vibrant coral. Something that reminds me of a color you'd wear with a bathing suit dress cover-up on a breezy day at the beach. It also has a mint-like smell.


Make Up Forever's Aqua Lip lipliner

 Layered with the Glossy Full Couleur #3  makes your lips seriously pop beautifully. Also a shade of coral, this lipliner is bold and long lasting since it's waterproof.


I think this look is adorable and it's great for the summer, I wear it out now because I just <3 to rebel againt the weary winter.


Saturday, December 17, 2011

The Double Wing

         So you'v seen something similiar to this on Lady Gaga and other celebrities, only more dramatic i.e. :

well this look particularly Lady Gaga o_O


It's the Double Wing. And it can be pulled off in a casual way, most widely known for pin-up looks or artisticly. It's versitile, it's cute, and it's even a great way to give the illusion of fuller eyelashes.


I did a more toned down and casual double wing that you can get away with wearing basically everywhere. :)


click to make larger :]


Sunday, December 11, 2011

Favorite Red Lipstick

 I got the Viva Glam 1 lipstick a few years ago and I still cant find a red lipstick that looks better me!


It really lasts  all day and doesn't smudge easily when you kiss someone :)


Friday, December 9, 2011

Gawwwjjusss!


I bought a few new rings at a local fair for only 2$ EACH!


I love anything that reminds me of all things vintage or have a victorian look to it.
I can never decide which I want to wear everyday and pretty much end up wearing almost all of them at once lol. They haven't turned my fingers green yet either!

The first three are from the fair, the fourth is from KaRa ( which is where I practically live ) and the last one I got in some random small shop on Canal St. in the city. I adore ladybugs so when I saw it , I was like "aagghh"  :)

Saturday, December 3, 2011

Fresh Nails!

Figured I'd share this
I got my nails done a couple of days ago


It was kind of a snowball effect, I wanted something simple, then I saw the glitter, then I saw the rhinestones... Oh welliez, atleast its pretty :)


Tuesday, November 22, 2011

Mending Broken Eyeshadow Back Together


As what happens with most eyeshadows they tend to break. Whether it's because the eyeshadow is old or has been banged up in your bag so much from being taken back and forth, the feeling you get is still the same. [ WTF ]
You're now totally bummed because you spent a pretty penny or you really needed that color because it matches your mini perfectly and you just won't make the same appearance at the club without it.
SO..
                                          

This is what you can do!

1. Break up the eyeshadow into little bits with a toothpick

                       
2. Pour a very little amount of rubbing alcohol onto the shadow.
Preferably over 90% because its kills the most germs but 70% will work fine as well.
Make sure, depending on the size of the shadow, that you start off with less and then gradually add more.


It should not look runny, but more like muddy. Still a somewhat thick consistancy.

3. Then put a facecloth, cheesecloth, or a folded paper towel over the shadow and press firmly with an object of its shape.


4. Peel it off after 5 or 6 seconds.
It might look grainy depending on what you used.


Voila`!


Remember:  The pattern of the object will be the direct design of the shadow. Hence why the shadow above looks "grainy" rather than smooth. The towel wasnt smooth. For smoothest/best results , use a few completely flat unwrinkled tissues or a smooth hankerchief.


This was my first time doing it and it seemed quick and easy to me. I turned the palette upside down and tapped on it for a bit and none of it flaked off.. so it works!


Sunday, November 20, 2011

So a little about myself

Hey hey! I'm Michele Andrea and I'm a freelance makeup artist in Staten Island, New York. I graduated from The Academy NYC- A Paul Mitchell Partner School where I was educated in Hair, Make Up  and Esthetics. I fell in love with make-up when I was 16 yrs old. I'd sit on my laptop for hours looking at all different types of styles and youtube tutorials and practice all night. I eventually bought books and started practicing on anyone around me that would let me lol. Now I do hair and makeup for my friends and parties; and when I have the chance, photoshoots and films. I also absolutely LOVE extentions and can put in beaded and fusion extentions if you wanted :) .
My long term goals are to have my own cosmetics line and teach classes.
"With the right mind behind the brush, anything is possible." - Michele Andrea
Thanks for reading! xoxo


Wednesday, November 9, 2011

Updo's!

These are some looks I've done that are good for weddings and sweet sixteens :)